UI Builder - 2 (開始使用UI Builder)
使用UI Builder建立UI的流程一般會是
- 建立一個新
UI Document (UXML) - 為你的UI結構加入element
- 在 Inspector 中調整element的attributes與style
- 如果有多個element使用相同的style,可以建立USS style sheets與selectors(類似網頁的css)
- 測試UI是否符合你的需求,並將inline style放到USS中
- 儲存UI Document (UXML)
以下範例將
- 建立一個root element作為background,這個root element會含有兩個containers。
- 一個container用來放角色名稱的list,
- 另外一個用來放角色的詳細資訊。
- 在這個角色的詳細資訊container中會加入background與foreground frames。
- 以及兩個label,用來顯示角色名稱
建立Root Element
- 首先建立一個Unity專案
- 開啟UI Builder,
Window>UI Toolkit>UI Builder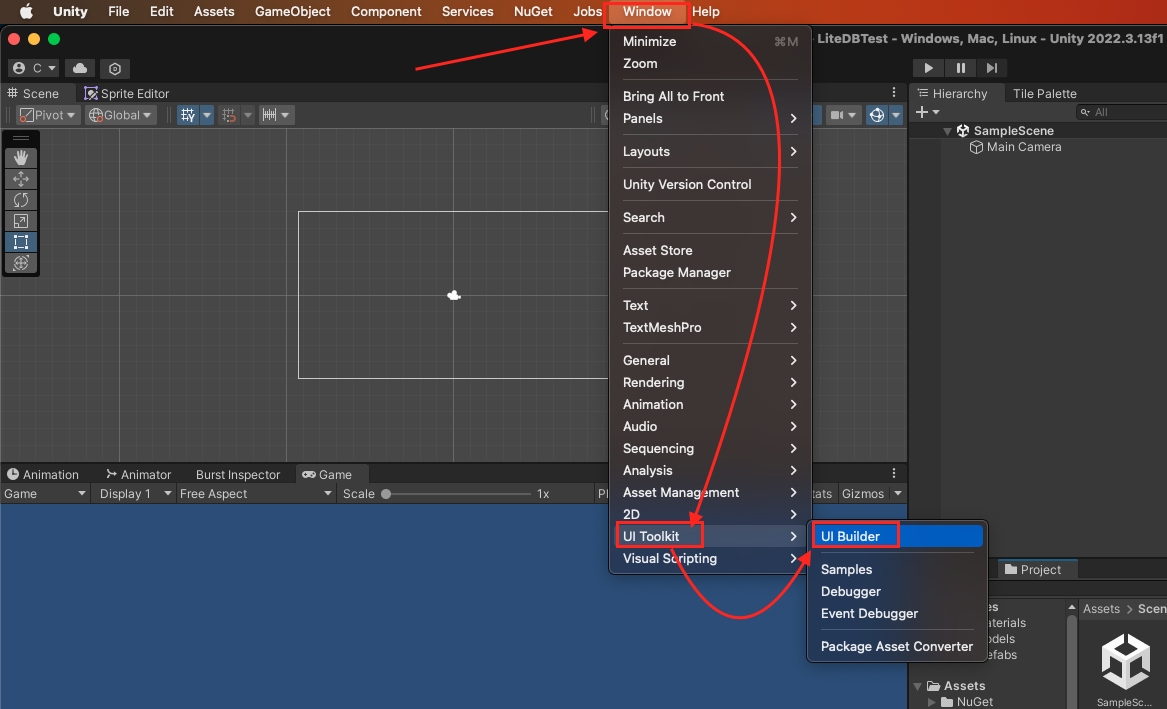
- 在UI Builder的Viewpoint中左上角找到
File>New建立一個新的UXML document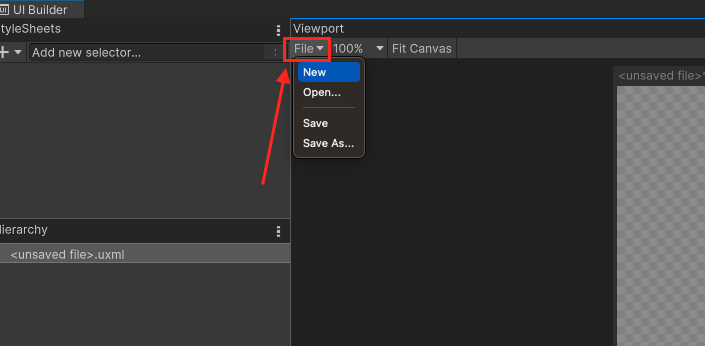
- 選擇
Save,儲存為MainView.uxml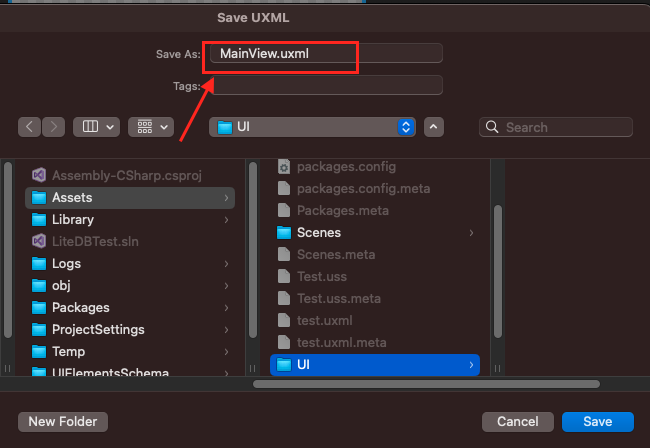
- 在左下角
Library中,找到VisualElement,將它拖入Viewport中(雙擊VisualElement也可以)
- 在右側``Inspector`中,找到Inlined Styled,可以在此處修改element的風格
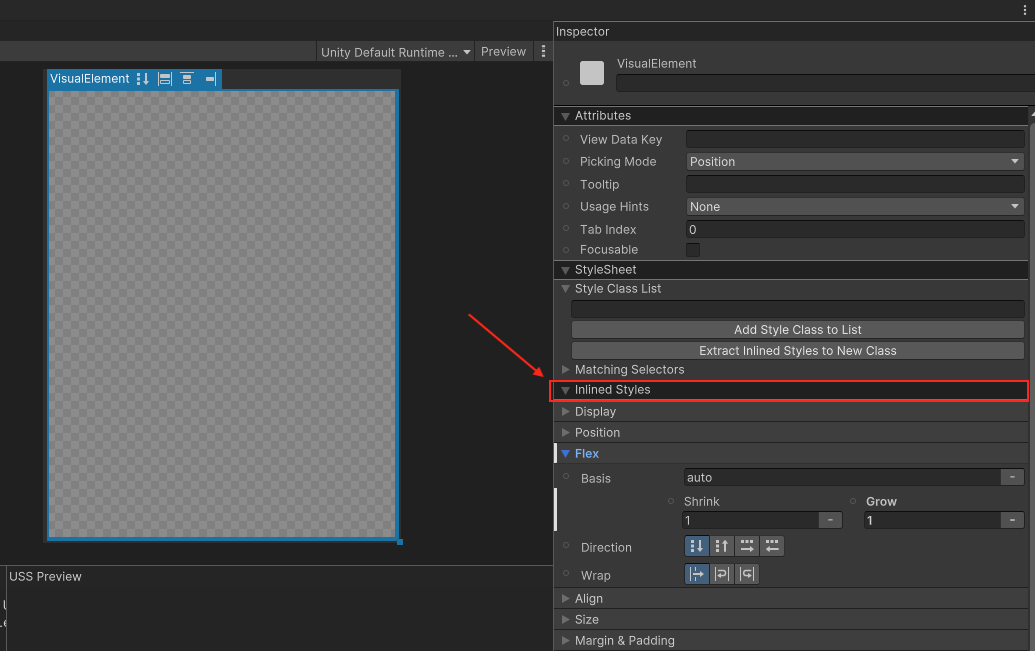
- 找到
Flex,將Grow設為1,這會把flex-grow的值設為1,讓它填滿整個螢幕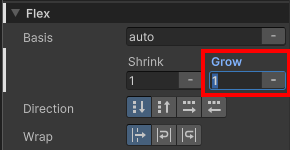
- 接著找到
Align,將Align Items與Justify Content都設為Center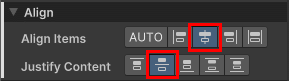
- 把
Background的Color設為#732526,並將透明度設為255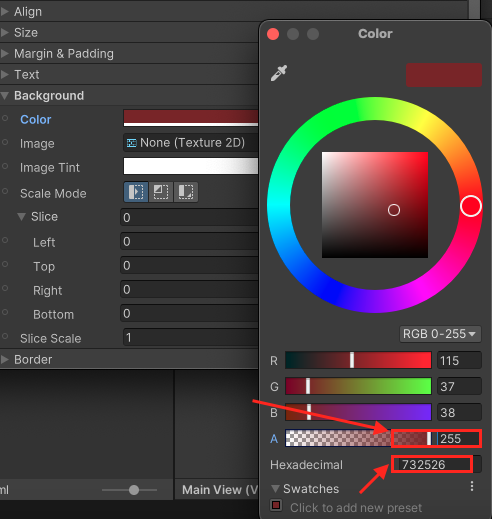
建立Parent Container
- 在左下角
Library中,將VisualElement拖入前面建立的rootVisualElement中。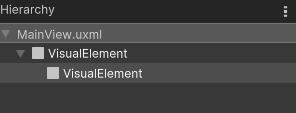
- 將這個新建
VisualElement它的Flex中的Direction設為row,並把它Size中的Height設為350pixels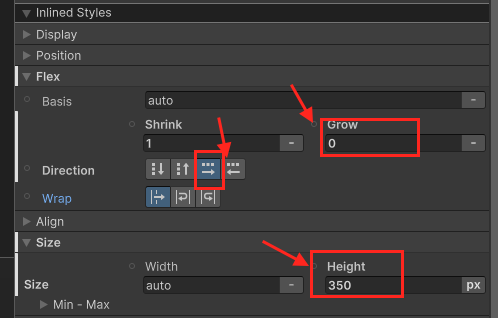
建立角色名稱List Container
- 在左下角
Library中,找到ListView將它拖入前面建立的Parent ContainerVisualElement中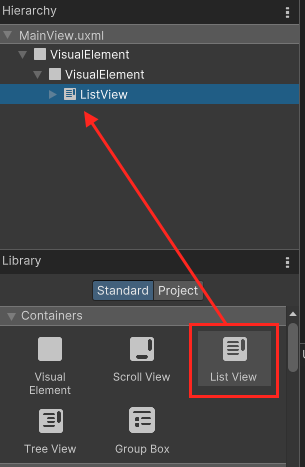
- 修改這個
ListView的name,改為CharacterList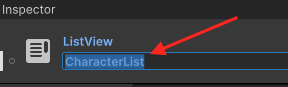
- 將這個
ListView它Size中的Width設為230pixels,並找到Margin & Padding>Margin>Right把Right設為6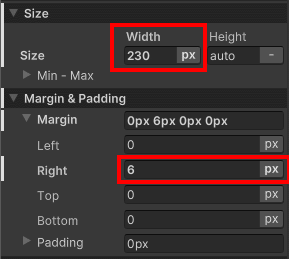
- 設定它的
Background>Color為#6E3925,並設定透明度為255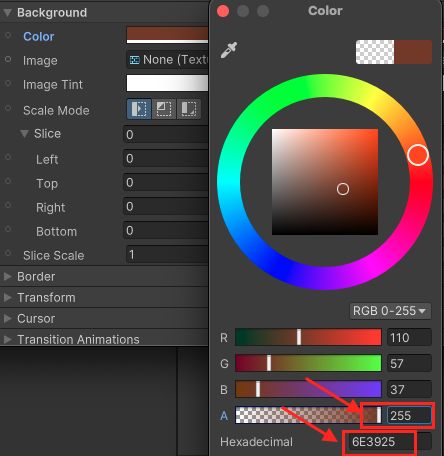
- 設定它的
Border>Color為#311A11,並設定透明度為255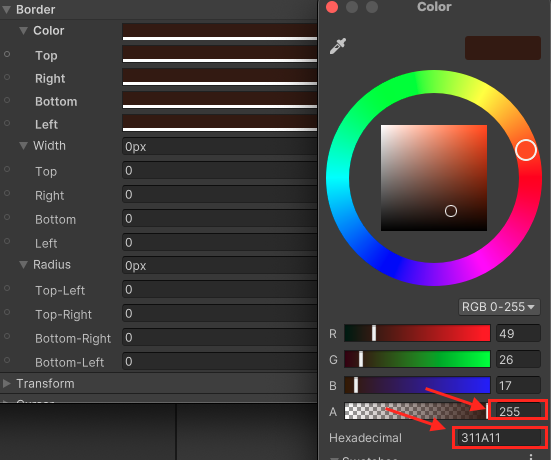
- 設定它的
Border>Width設為4pixels,Radius設為15pixels。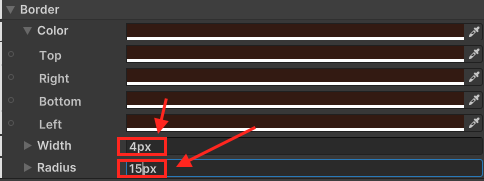
此時你的UI看起來會長這樣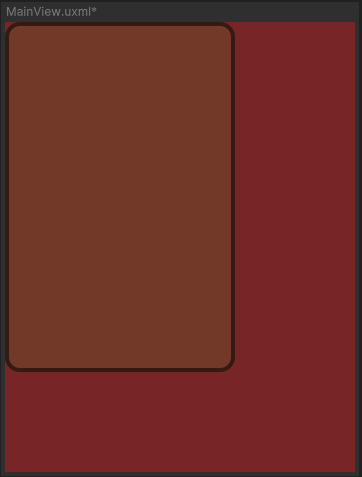
建立角色詳細訊息 Container
- 在Parent Container中再加入一個
VisualElement,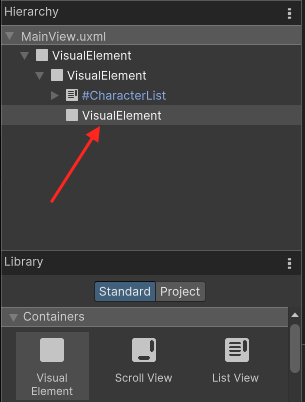
- 將它
Align>Align Items設為flex-end,並且把Align>Justify Content設為space-between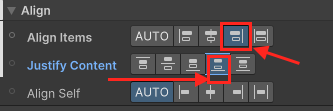
- 將它
Flex>Basis>Shrink設為0,並且把Flex>Basis>Grow也設為0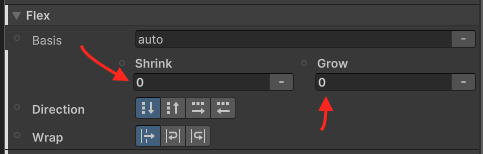
- 在這個
VisualElement中加入一個VisualElement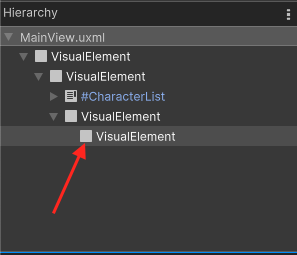
- 為這個
VisualElement設定Size>Width為276pixels;Align>Align Items為center;Align>Justify Content為center;最後設定Margin & Padding>Padding為8pixels。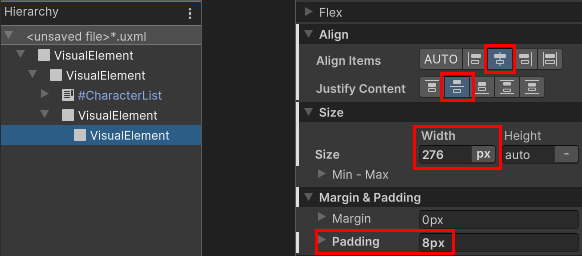
- 為這個
VisualElement設定Background>Color為#AA5939,並設定透明度為255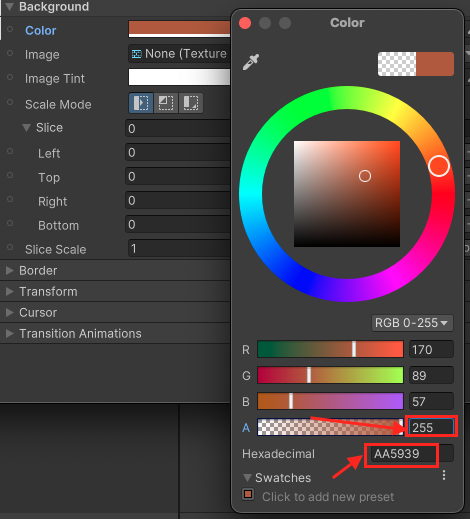
- 為這個
VisualElement設定Border>Color為#311A11,透明度設為255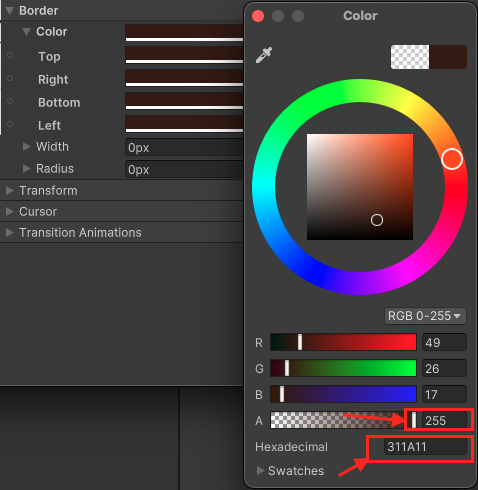
- 為這個
VisualElement設定Border>Width設為4pixels,Radius設為15pixels。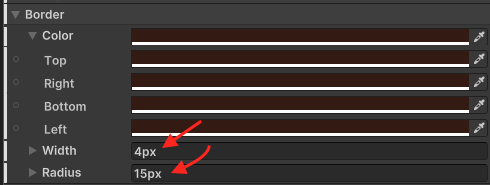
此時你的UI看起來會長這樣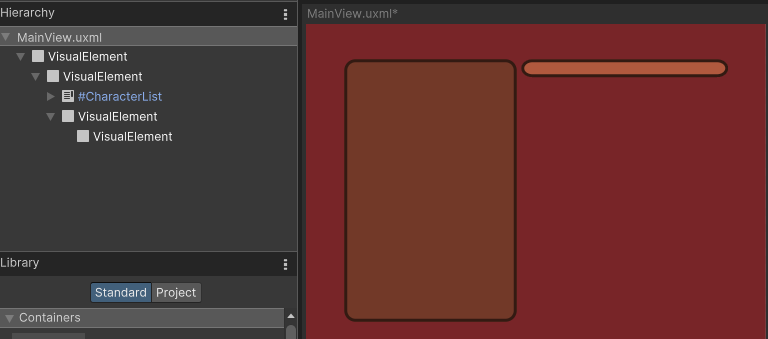
建立角色詳細訊息框背景
- 在角色詳細訊息 Container中加入一個
VisualElement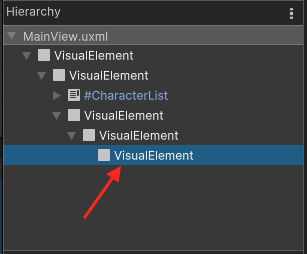
- 將它的
Size的Width與Height設為120pixels - 將它的
Margin & Padding>Padding設為4pixels - 將它的
Background>Color設為#FF8554,透明度設為255 - 將它的
Border>Color為#311A11,透明度設為255 - 將它的
Border>Width設為4pixels,Radius設為15pixels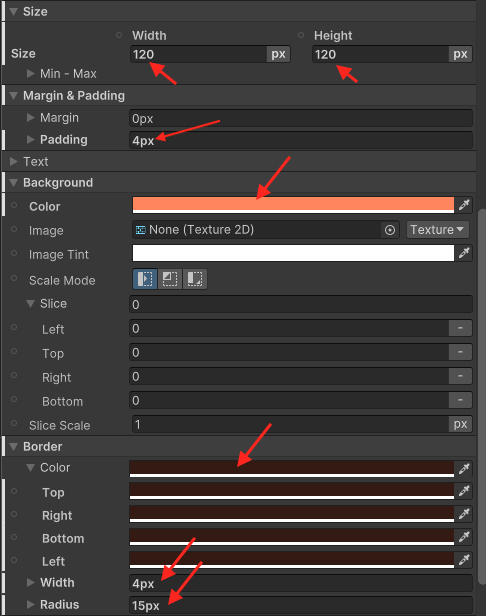
此時你的UI看起來會長這樣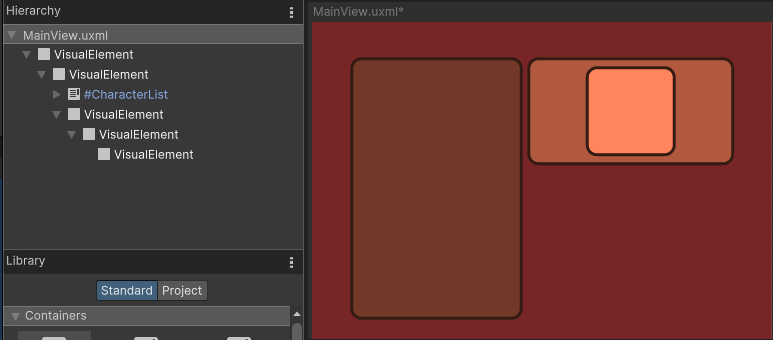
建立USS來管理Style
在建立UI時,可以發現Border的Style都是一樣的,因此我們可以把它們拿出來放到一個USS中方便管理
- 在
StyleSheet選擇+>Create New USS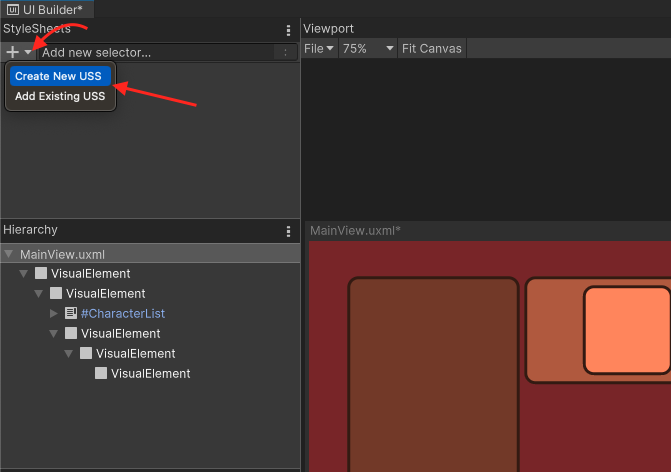
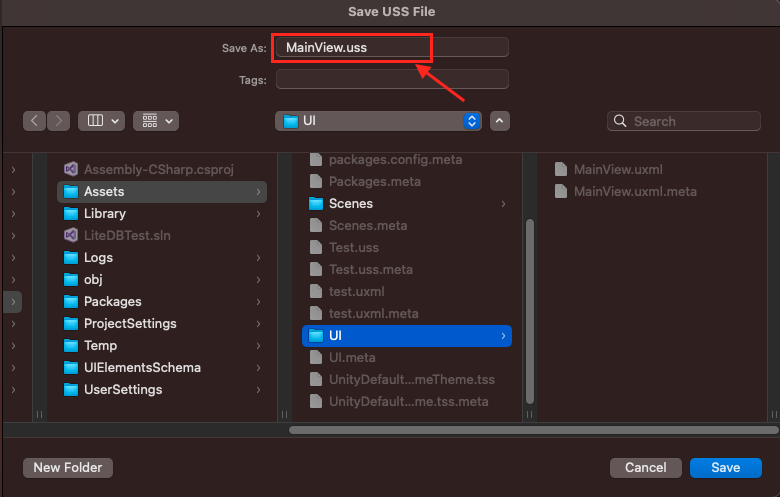
- 儲存為MainView.uss
- 點擊新建的
MainView.uss,並在右側的Inspertor中Selector輸入框中輸入.border,之後在點擊Create New USS Selector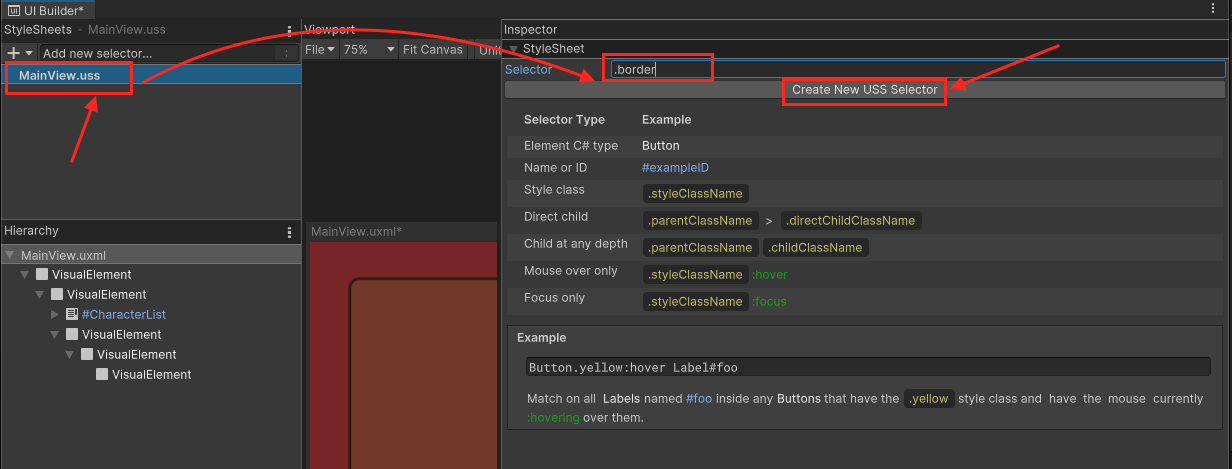
- 接著你可以在左側的
StyleSheet中看到剛剛建立的.borderclass - 點擊
.borderclass後,在右側的Inspertor,將Border>Color設為#311A11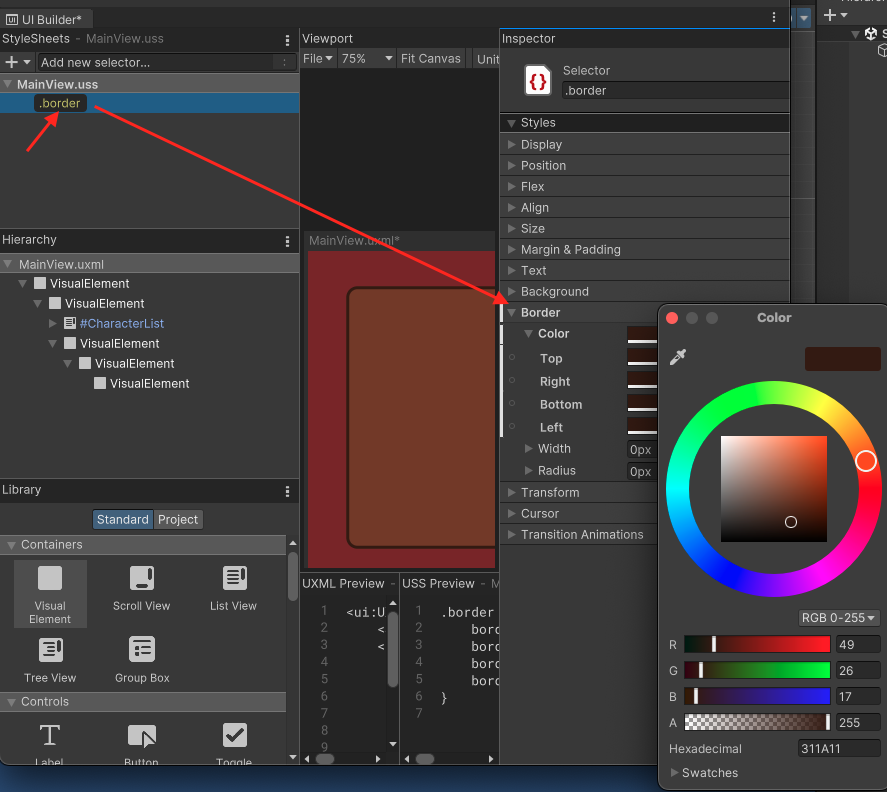
- 將它的
Border>Width設為2pixels,Radius設為15pixels - 將這個
.borderclass拖動到角色詳細訊息 Container與角色詳細訊息框的VisualElement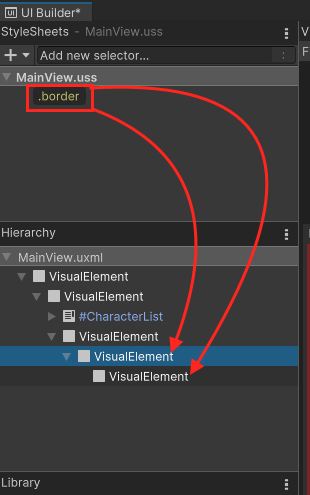
- 點選
角色詳細訊息 Container與角色詳細訊息框的VisualElement,在右側的Inspertor中找到Border,並對Border按下滑鼠右鍵,會跳出一個選單,選擇Unset將Border的inline style清除。
建立角色詳細訊息框前景
- 在
角色詳細訊息框背景的VisualElement加入一個VisualElement並將它命名為CharacterPortrait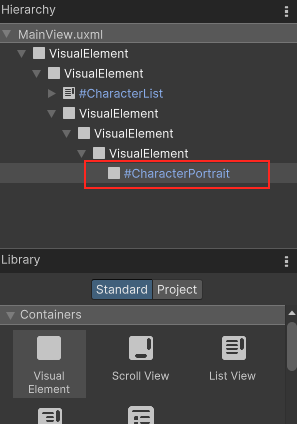
- 設定它的
Flex>Grow為1,這樣它裡面的圖片就可以充滿整個可用空間。 - 設定它的
Background>Scale Mode為scale-to-fit,這樣它的圖片就可以充滿element size,並且保持適當的長寬比(aspect ratio)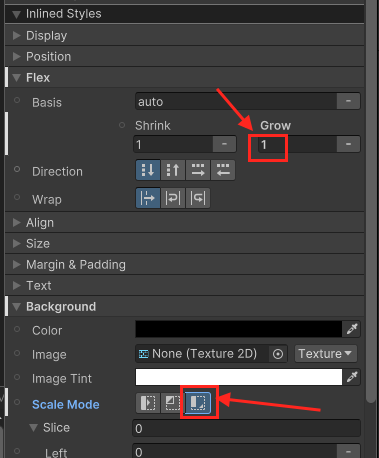
建立角色詳細訊息Labels
- 在
角色詳細訊息框背景的VisualElement加入兩個Labels,並分別命名為CharacterName與CharacterClass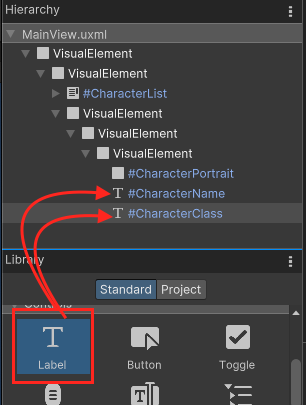
- 選擇
#CharacterName,將它的Text>Font Style改為B;Text>Size改為18pixels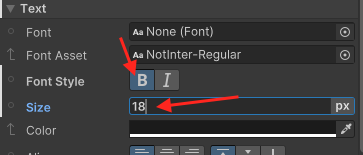
- 在
Attributes>Text中可以更改顯示的字串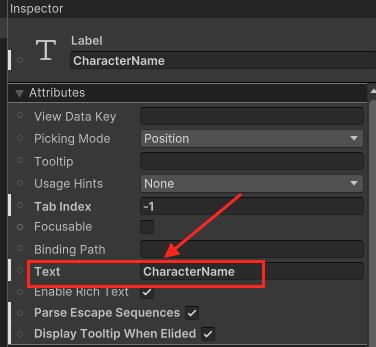
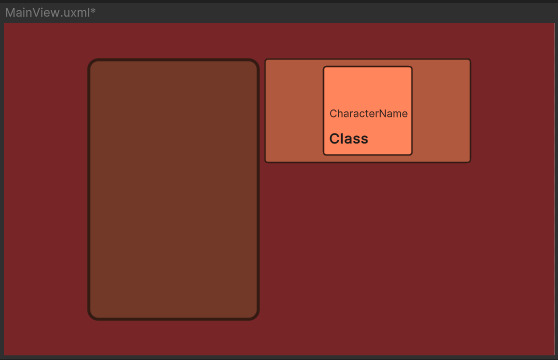
最後你的UI看起來會長這樣
Reference: https://docs.unity3d.com/Manual/UIB-getting-started.html