UI Builder - 3 (使用C# Script操控UI)

UI-Builder-2-(開始使用UI-Builder)中以建立一個空白的UI,接下來我們要開始為這個UI添加內容。

建立空白UI

  1. 首先需要為這些Element命名,為了方便起見,先將這段UXML複製
    1
    2
    3
    4
    5
    6
    7
    8
    9
    10
    11
    12
    13
    14
    15
    16
    17
    <ui:UXML xmlns:ui="UnityEngine.UIElements" xmlns:uie="UnityEditor.UIElements" editor-extension-mode="False">
    <Style src="MainView.uss" />
    <ui:VisualElement name="background">
    <ui:VisualElement name="main-container">
    <ui:ListView focusable="true" name="character-list" />
    <ui:VisualElement name="right-container">
    <ui:VisualElement name="details-container">
    <ui:VisualElement name="details">
    <ui:VisualElement name="character-portrait" />
    </ui:VisualElement>
    <ui:Label text="Label" name="character-name" />
    <ui:Label text="Label" display-tooltip-when-elided="true" name="character-class" />
    </ui:VisualElement>
    </ui:VisualElement>
    </ui:VisualElement>
    </ui:VisualElement>
    </ui:UXML>
  2. 接著在專案中,找到MainView.uxml,滑鼠左鍵點選旁邊的小箭頭,把它點開,會出現會出現inlineStyle
  3. 對著inlineStyle滑鼠左鍵點兩下,就會用IDE開啟MainView.uxml
  4. 接著把上面的UXML內容複製進去,存檔。
  5. 再開啟MainView.uss,把下面這一段內容複製進去,存檔
    1
    2
    3
    4
    5
    6
    7
    8
    9
    10
    11
    12
    13
    14
    15
    16
    17
    18
    19
    20
    21
    22
    23
    24
    25
    26
    27
    28
    29
    30
    31
    32
    33
    34
    35
    36
    37
    38
    39
    40
    41
    42
    43
    44
    45
    46
    47
    48
    49
    50
    51
    52
    53
    54
    55
    56
    57
    58
    59
    60
    61
    62
    63
    64
    #background {
    flex-grow: 1;
    align-items: center;
    justify-content: center;
    background-color: rgb(115, 37, 38);
    }

    #main-container {
    flex-direction: row;
    height: 350px;
    }

    #character-list {
    width: 230px;
    border-color: rgb(49, 26, 17);
    border-width: 4px;
    background-color: rgb(110, 57, 37);
    border-radius: 15px;
    margin-right: 6px;
    }

    #character-name {
    -unity-font-style: bold;
    font-size: 18px;
    }

    #CharacterClass {
    margin-top: 2px;
    margin-bottom: 8px;
    padding-top: 0;
    padding-bottom: 0;
    }

    #right-container{
    justify-content: space-between;
    align-items: flex-end;
    }

    #details-container{
    align-items: center;
    background-color: rgb(170, 89, 57);
    border-width: 4px;
    border-color: rgb(49, 26, 17);
    border-radius: 15px;
    width: 252px;
    justify-content: center;
    padding: 8px;
    height: 163px;
    }

    #details{
    border-color: rgb(49, 26, 17);
    border-width: 2px;
    height: 120px;
    width: 120px;
    border-radius: 13px;
    padding: 4px;
    background-color: rgb(255, 133, 84);
    }

    #character-portrait{
    flex-grow: 1;
    -unity-background-scale-mode: scale-to-fit;
    }
  6. 接著再打開UI Builder,就可以看到一個空白的UI了。

建立一個List Enrty

  1. 在專案畫面,建立一個ListEntry.uxmlCreate > UI Toolkit > UI Document
  2. 將以下內容貼上
    1
    2
    3
    4
    5
    6
    <ui:UXML xmlns:ui="UnityEngine.UIElements" xmlns:uie="UnityEditor.UIElements" editor-extension-mode="False">
    <Style src="ListEntry.uss" />
    <ui:VisualElement name="list-entry">
    <ui:Label text="Label" display-tooltip-when-elided="true" name="character-name" />
    </ui:VisualElement>
    </ui:UXML>
  • 其中<Style src="ListEntry.uss" />會引用等一下建立的ListEntry.uss
  1. 使用類似的方式,Create > UI Toolkit > Style Sheet,建立一個ListEntry.uss,並將以下內容貼上
    1
    2
    3
    4
    5
    6
    7
    8
    9
    10
    11
    12
    13
    14
    15
    16
    #list-entry {
    height: 41px;
    align-items: flex-start;
    justify-content: center;
    padding-left: 10px;
    background-color: rgb(170, 89, 57);
    border-color: rgb(49, 26, 17);
    border-width: 2px;
    border-radius: 15px;
    }

    #character-name {
    -unity-font-style: bold;
    font-size: 18px;
    color: rgb(49, 26, 17);
    }
  2. 可以使用UI Builder打開這個ListEntry.uxml來觀看UI的樣貌

建立 C# Script與其互動

  1. Asset資料夾下面,建立一個Scripts資料夾
  2. 建立一個CharacterData.cs
  3. 將以下內容複製到CharacterData.cs
1
2
3
4
5
6
7
8
9
10
11
12
13
14
using UnityEngine;

public enum ECharacterClass
{
Knight, Ranger, Wizard
}

[CreateAssetMenu] // 這個Attribute會在Create選單中加入這個CharacterData
public class CharacterData : ScriptableObject
{
public string CharacterName;
public ECharacterClass Class;
public Sprite PortraitImage;
}
  1. Asset資料夾下面,建立一個Resources資料夾
  2. Resources資料夾下面,建立一個Characters資料夾
  3. Characters資料夾中,選擇Create > Character Data建立一個ScriptableObject

將UI放到Sence中

  1. Scene選擇GameObject > UI Toolkit > UI Document,建立一個UI Document GameObject
  2. Hierarchy視窗中選擇UIDocument Game Object,將MainView.uxml拖放到右側的Source Asset

建立Controllers

在專案中建立兩個C# controller,與一個MainView

  1. CharacterListEntryController:負責更新ListEntry.uxmlLabel
  2. CharacterListController:負責處理MainView.uxml
  3. MainView繼承MonoBehaviour,主要用來與UIDocument GameObject連結,取得UIDocument Game Object後,把它放入CharacterListController
1
2
3
4
5
6
7
8
9
10
11
12
13
14
15
16
17
18
using UnityEngine.UIElements;

public class CharacterListEntryController
{
Label NameLabel;

// 這個function用來設定VisualElement,讓這個controller可以更改label
public void SetVisualElement(VisualElement visualElement)
{
NameLabel = visualElement.Q<Label>("character-name");
}

// 使用CharacterData設定Label的Text
public void SetCharacterData(CharacterData characterData)
{
NameLabel.text = characterData.CharacterName;
}
}
1
2
3
4
5
6
7
8
9
10
11
12
13
14
15
16
17
18
19
20
21
22
23
24
25
26
27
28
29
30
31
32
33
34
35
36
37
38
39
40
41
42
43
44
45
46
47
48
49
50
51
52
53
54
55
56
57
58
59
60
61
62
63
64
65
66
67
68
69
70
71
72
73
74
75
76
77
78
79
80
81
82
83
84
85
86
87
88
89
90
91
92
93
94
95
96
97
98
99
100
using System.Collections.Generic;
using UnityEngine;
using UnityEngine.UIElements;

public class CharacterListController
{
// UXML template for list entries
VisualTreeAsset ListEntryTemplate;

// UI element references
ListView CharacterList;
Label CharClassLabel;
Label CharNameLabel;
VisualElement CharPortrait;

public void InitializeCharacterList(VisualElement root, VisualTreeAsset listElementTemplate)
{
EnumerateAllCharacters();

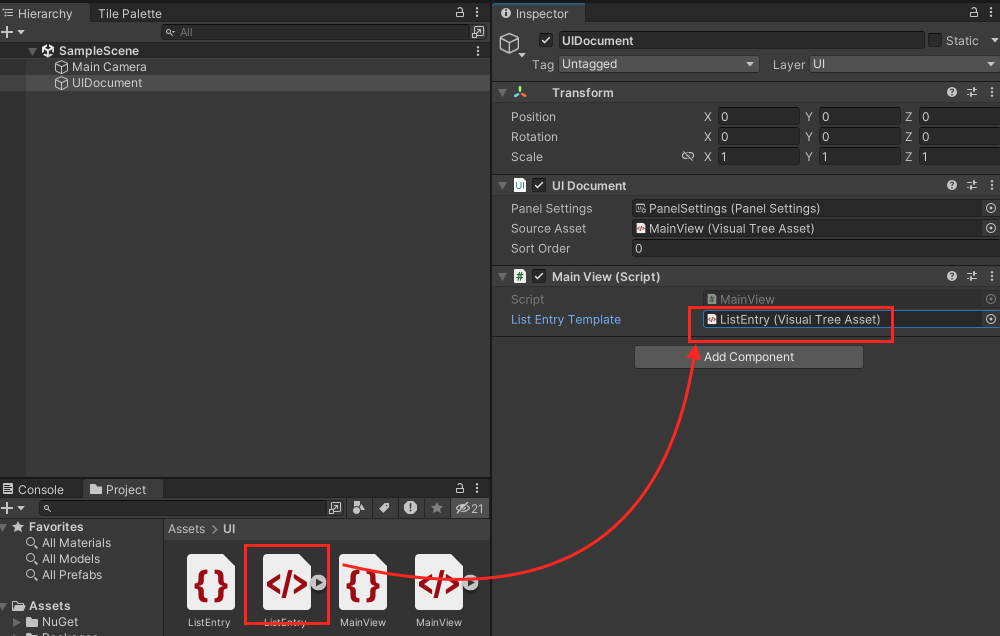
// Store a reference to the template for the list entries
ListEntryTemplate = listElementTemplate;

// Store a reference to the character list element
CharacterList = root.Q<ListView>("character-list");

// Store references to the selected character info elements
CharClassLabel = root.Q<Label>("character-class");
CharNameLabel = root.Q<Label>("character-name");
CharPortrait = root.Q<VisualElement>("character-portrait");

FillCharacterList();

// Register to get a callback when an item is selected
CharacterList.onSelectionChange += OnCharacterSelected;
}

List<CharacterData> AllCharacters;

void EnumerateAllCharacters()
{
AllCharacters = new List<CharacterData>();
AllCharacters.AddRange(Resources.LoadAll<CharacterData>("Characters"));
}

void FillCharacterList()
{
// Set up a make item function for a list entry
CharacterList.makeItem = () =>
{
// Instantiate the UXML template for the entry
var newListEntry = ListEntryTemplate.Instantiate();

// Instantiate a controller for the data
var newListEntryLogic = new CharacterListEntryController();

// Assign the controller script to the visual element
newListEntry.userData = newListEntryLogic;

// Initialize the controller script
newListEntryLogic.SetVisualElement(newListEntry);

// Return the root of the instantiated visual tree
return newListEntry;
};

// Set up bind function for a specific list entry
CharacterList.bindItem = (item, index) =>
{
(item.userData as CharacterListEntryController).SetCharacterData(AllCharacters[index]);
};

// Set a fixed item height
CharacterList.fixedItemHeight = 45;

// Set the actual item's source list/array
CharacterList.itemsSource = AllCharacters;
}

void OnCharacterSelected(IEnumerable<object> selectedItems)
{
// Get the currently selected item directly from the ListView
var selectedCharacter = CharacterList.selectedItem as CharacterData;

// Handle none-selection (Escape to deselect everything)
if (selectedCharacter == null)
{
// Clear
CharClassLabel.text = "";
CharNameLabel.text = "";
CharPortrait.style.backgroundImage = null;

return;
}

// Fill in character details
CharClassLabel.text = selectedCharacter.Class.ToString();
CharNameLabel.text = selectedCharacter.CharacterName;
CharPortrait.style.backgroundImage = new StyleBackground(selectedCharacter.PortraitImage);
}
}
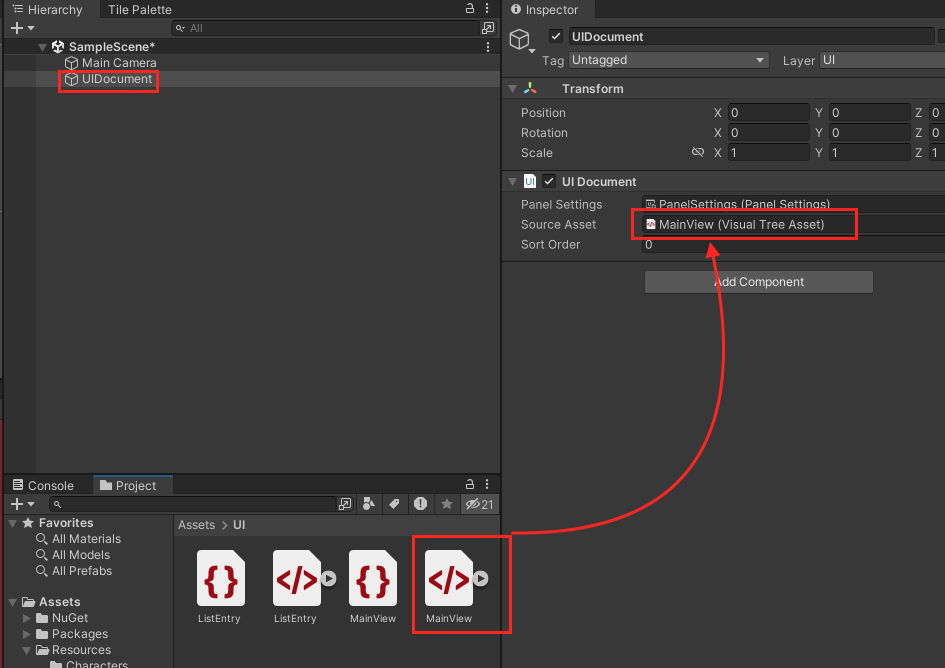
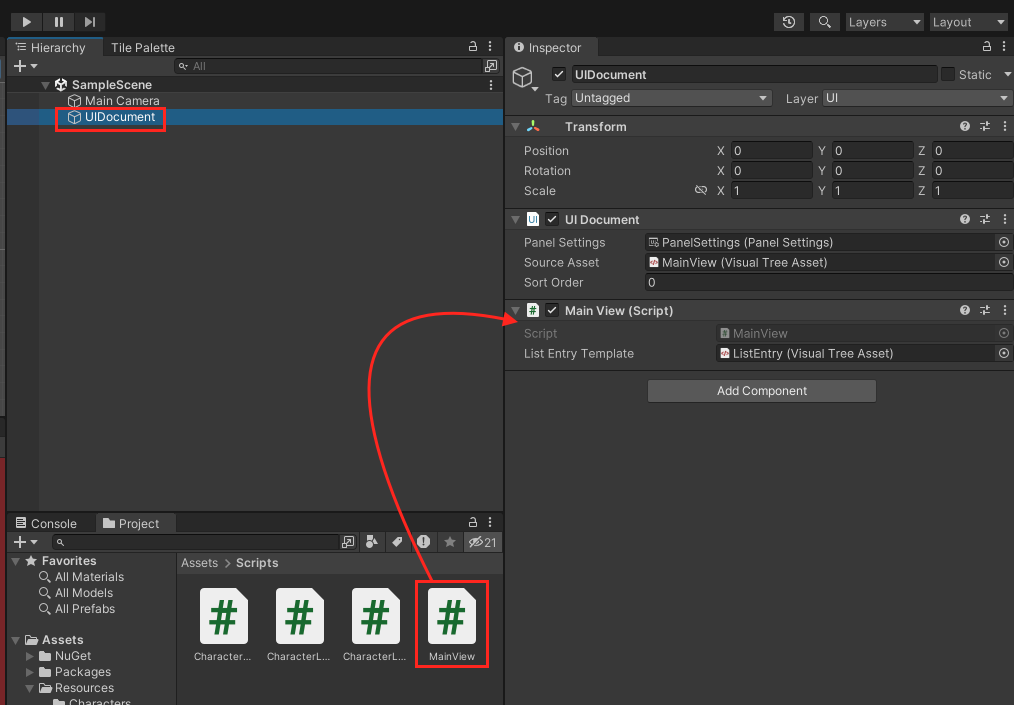
1
2
3
4
5
6
7
8
9
10
11
12
13
14
15
16
17
18
using UnityEngine;
using UnityEngine.UIElements;

public class MainView : MonoBehaviour
{
[SerializeField]
VisualTreeAsset ListEntryTemplate;

void OnEnable()
{
// The UXML is already instantiated by the UIDocument component
var uiDocument = GetComponent<UIDocument>();

// Initialize the character list controller
var characterListController = new CharacterListController();
characterListController.InitializeCharacterList(uiDocument.rootVisualElement, ListEntryTemplate);
}
}
  1. MainView拖入UIDocument GameObject。
  2. ListEntry.uxml拖入ListEntryTemplate

Reference:https://docs.unity3d.com/Manual/UIE-HowTo-CreateRuntimeUI.html


上一篇:UI-Builder-2-(開始使用UI-Builder)

評論