在 Unity 中使用 Unit test
本文記錄如何在 Unity 中使用內建的 Unity Test Runner 進行 Unit Test。 。
首先選擇 Window -> General -> Test Runner 開啟 Test Runner 。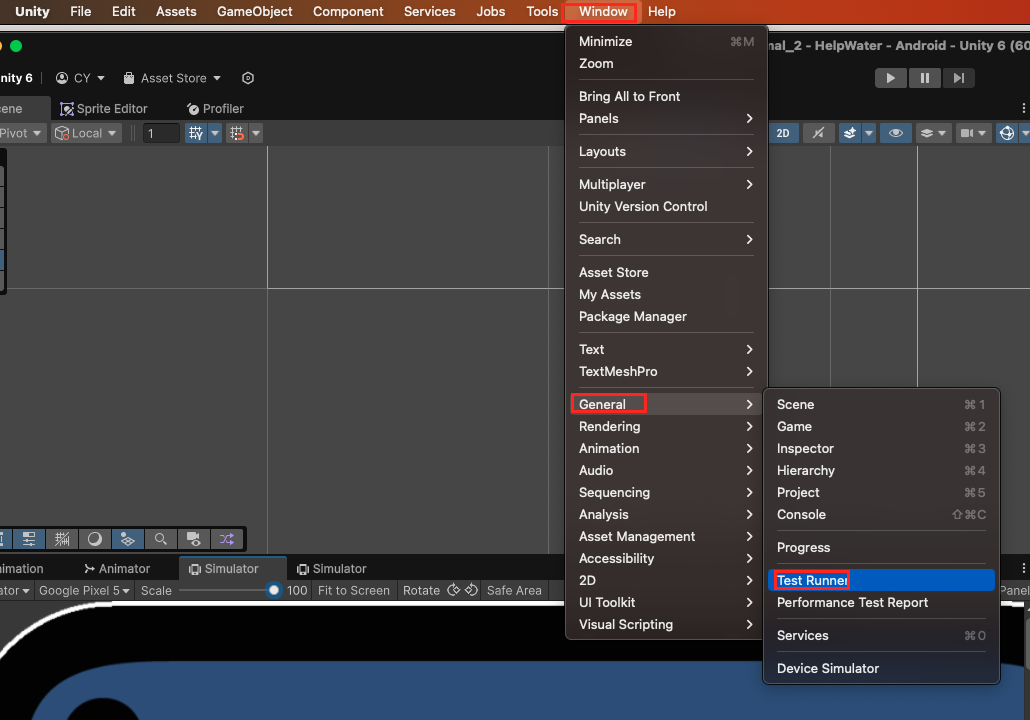
到 Test Runner 中找到 Create a Test new Assembly Folder in the active path. 按鈕,按下。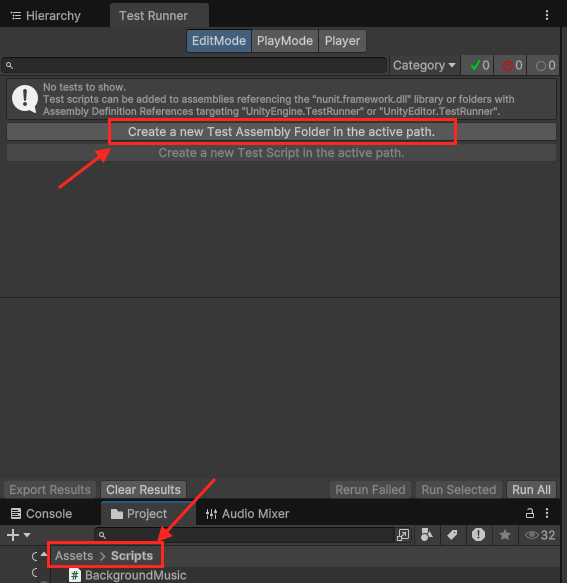
按下後會建立一個 Tests 資料夾,裡面會幫你建立一個 Tests.asmdef 檔案,這個檔案是 Unity 的 Assembly Definition File (程序集定義文件),讓你可以管理測試腳本的組件。
之後,為了讓測試腳本知道你寫的腳本,你需要在你放腳本的地方(如 Asserts/Scripts) 建立一個 Assembly Definition File (Create -> Scripting -> Assembly Definition), 並取為自己想要的名稱,這邊命名為 MyScriptAssembly。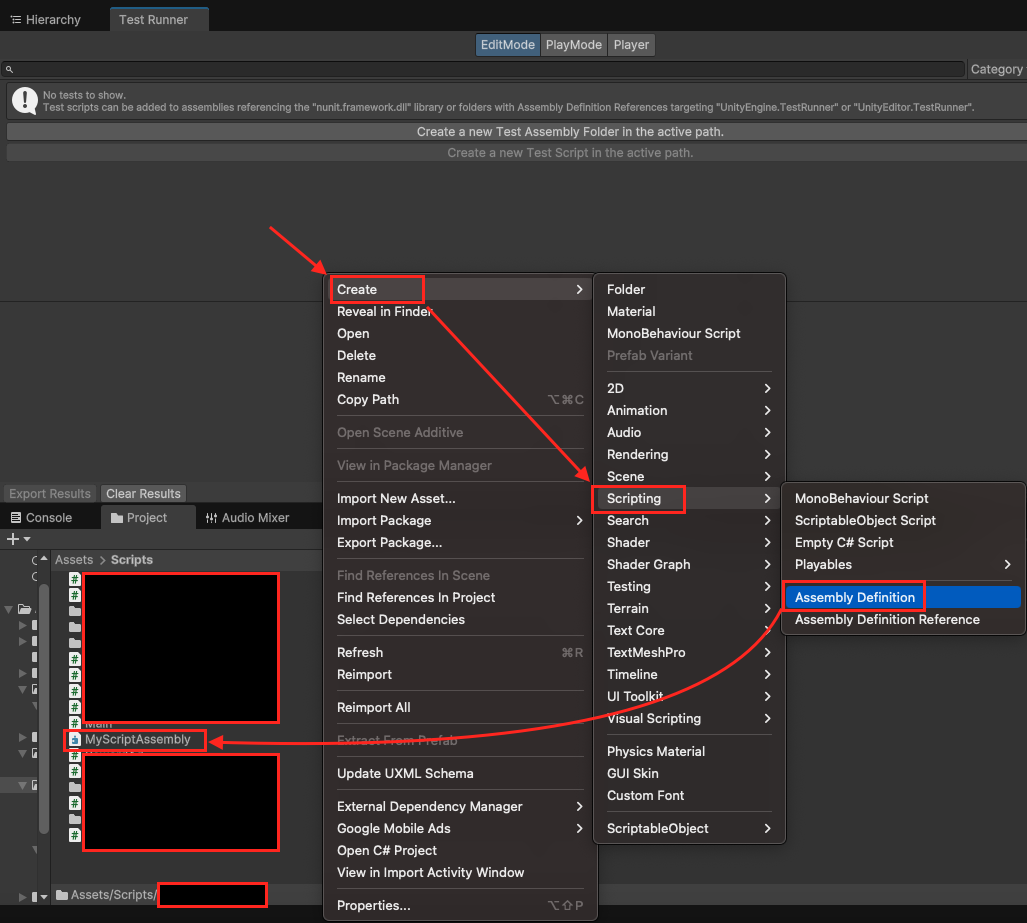
注意,如果你有使用 TextMeshPro 或是 DOTween 的話,你還需要在 MyScriptAssembly 中的 Assembly Definition References 加入 Unity.TextMeshPro 和 DOTween.Modules (預設不會有 DOTween.Modules,請參考 建立 DoTween 的 asmdef 檔案)。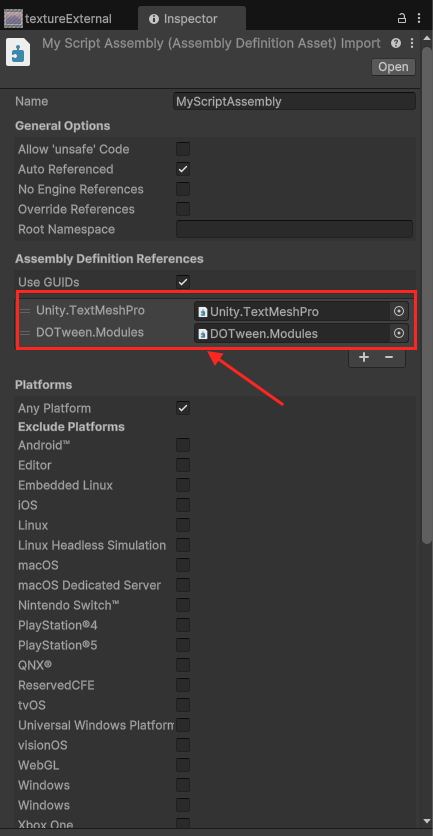
接著回到 Tests.asmdef 檔案,將 MyScriptAssembly 加入到 Tests.asmdef 的 Assembly Definition References 中。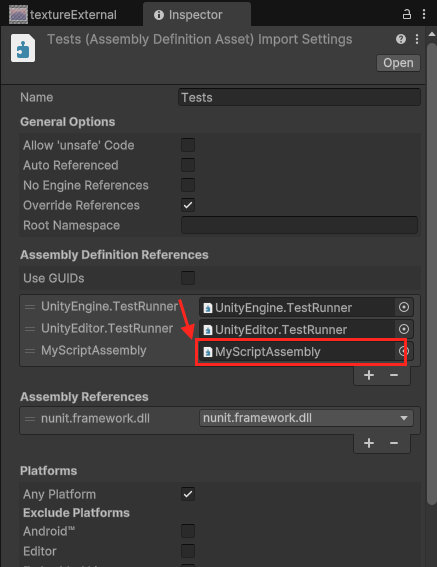
最後你就可以在 Unity 中開始使用 Unit Test 了,到 Tests 資料夾中,選擇 Create -> Testing -> C# Test Script 建立測試腳本。此外,你也可以在 Tests 資料夾中建立其他資料夾規劃你的測試。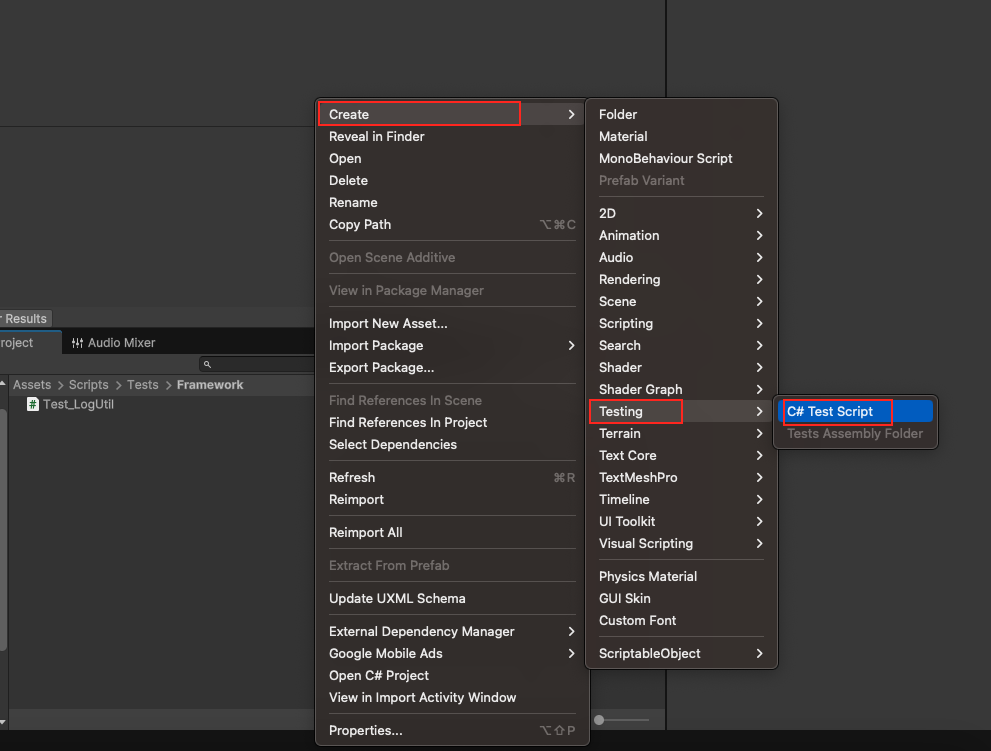
建立測試腳本
1 | public class NewTestScript |
到 Test Runner 就可以看到測試了,可以一個一個選擇執行,或是執行全部。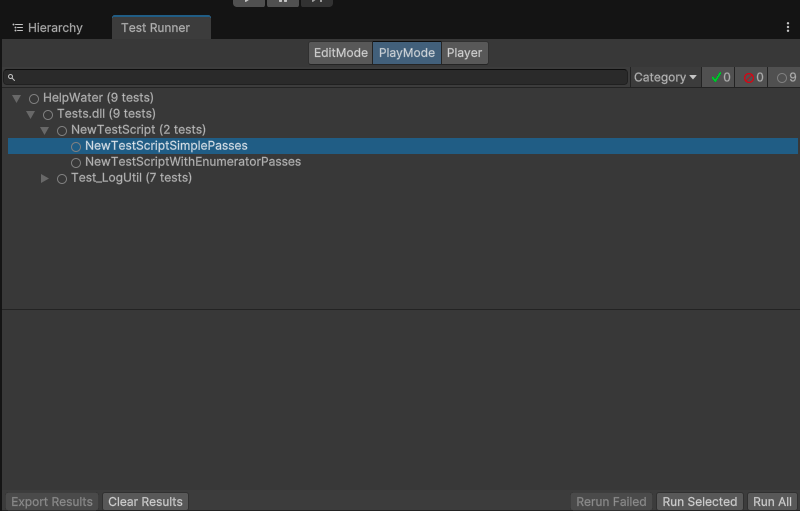
一些注意事項:
如果要測試拋出例外之類的測試的話,需要使用
LogAssert.Expect而不是Assert.***1
2
3
4
5
6
7
8
9
10
11
12
13
14
15
16
17
18
19
20
21
22// 測試錯誤日誌
[]
public void TestLogError()
{
testComponent.LogError("Test error message");
LogAssert.Expect(LogType.Error, "<color=red>❌</color>[<color=lightblue>TestObject</color>]: Test error message\n");
}
// 測試例外日誌
[]
public void TestLogException()
{
try {
int a = 0;
float b = 1 / a;
}
catch (System.Exception e)
{
testComponent.LogException(e, "My Message");
}
LogAssert.Expect(LogType.Exception, "DivideByZeroException: Attempted to divide by zero.");
}SetUp 與 TearDown
- SetUp: 每個測試案例開始前,會執行此方法。通常用來還原測試案例初始化狀態,確保測試案例不互相干擾。
- TearDown: 每個測試案例完成後,會執行此方法。通常用來清除測試案例的狀態,確保測試案例不互相干擾。
1
2
3
4
5
6
7
8
9
10
11
12
13
14
15
16
17
18
19
20
21private class TestObject : MonoBehaviour { }
private GameObject testGameObject;
private TestObject testComponent;
private LogCapture logCapture;
[]
public void Setup()
{
testGameObject = new GameObject("TestObject");
testComponent = testGameObject.AddComponent<TestObject>();
logCapture = new LogCapture();
Application.logMessageReceived += logCapture.HandleLog;
}
[]
public void Teardown()
{
Application.logMessageReceived -= logCapture.HandleLog;
Object.DestroyImmediate(testGameObject);
}
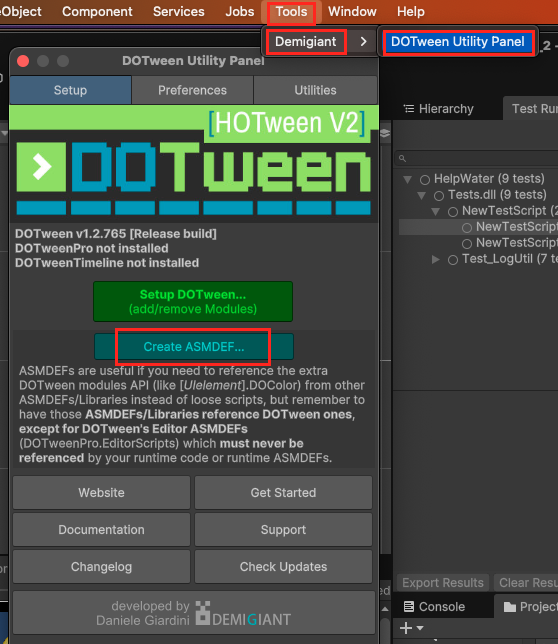
建立 DoTween 的 asmdef 檔案
一般預設是不會有 DoTween 的 asmdef 檔案,必須到 Tools -> Demigiant -> DOTween Utility Panel 中,開啟 DOTween Utility Panel
並找到 Create ASMDEF 按鈕 ,按下建立 asmdef 檔案。