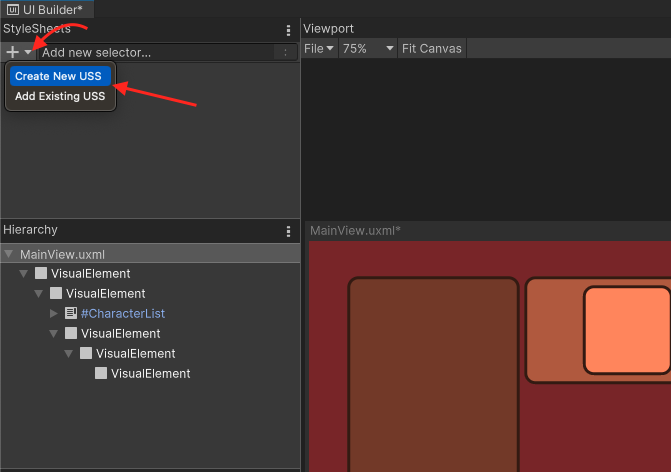
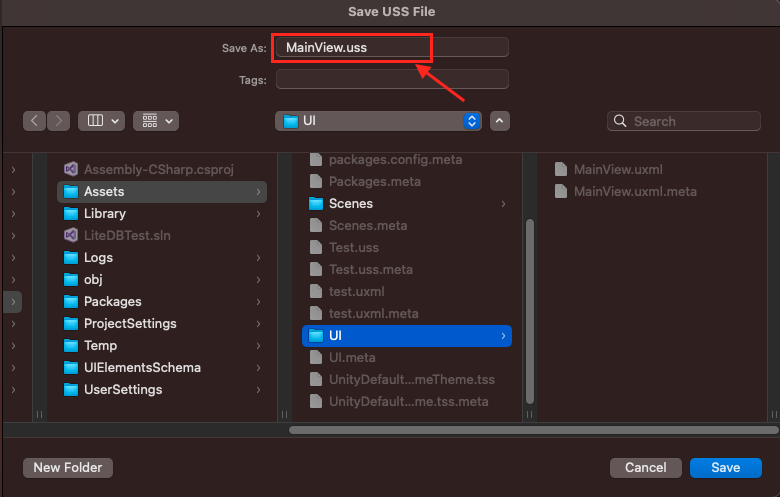
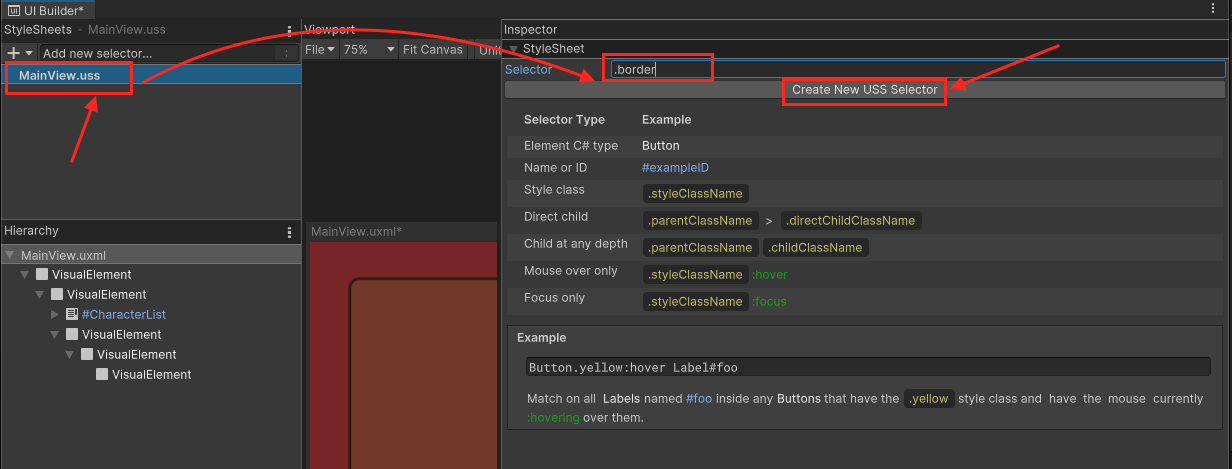
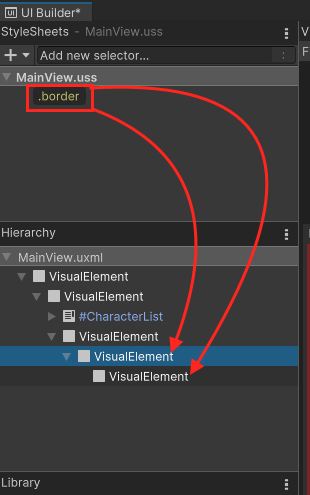
UI Builder - 1 (UI Builder介面簡介)

UI Builder,是一個可視化的UI編輯工具,讓你可以在使用UI Toolkit時可以編輯UI assets,如UI Documents(.uxml)與StyleSheets(.uss),此外還可以安裝以下的package增加額外的功能

  • com.unity.vectorgraphics:讓你可以將VectorImage指定為元素(element)的background style
  • com.unity.2d.sprite:讓你可以將 2D Sprite asset(或sub-asset)指定為元素的background style。安裝了此套件後,還可以直接從Inspector窗格中打開2D Sprite編輯器。

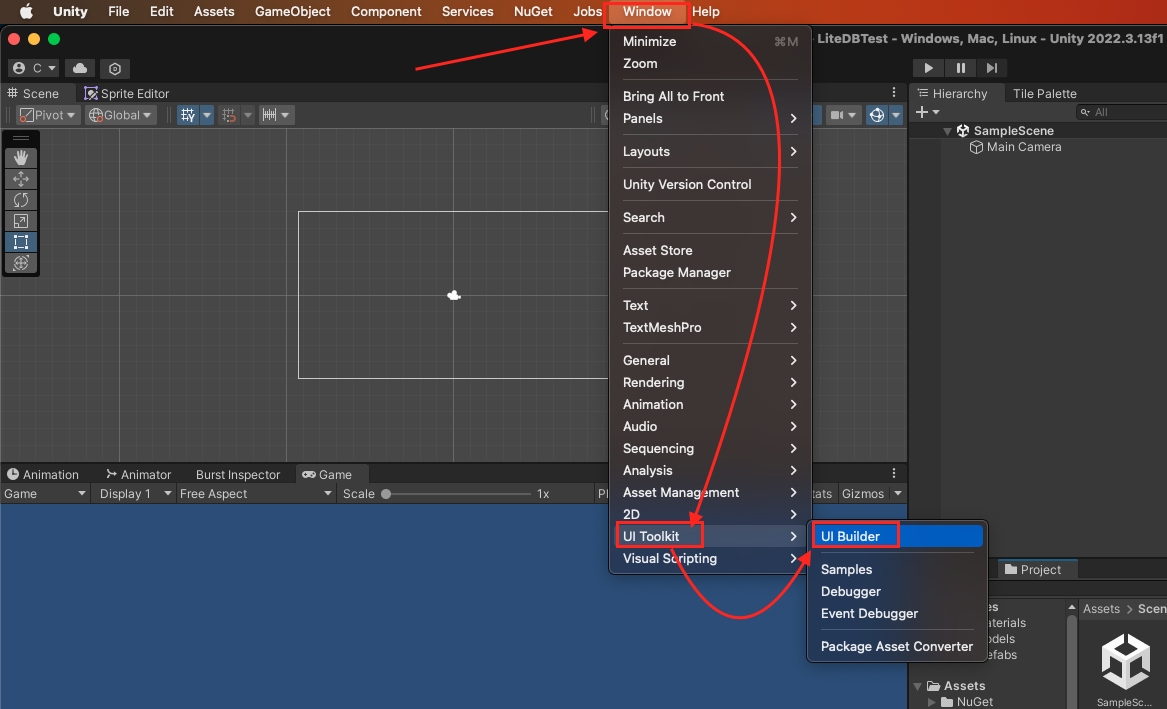
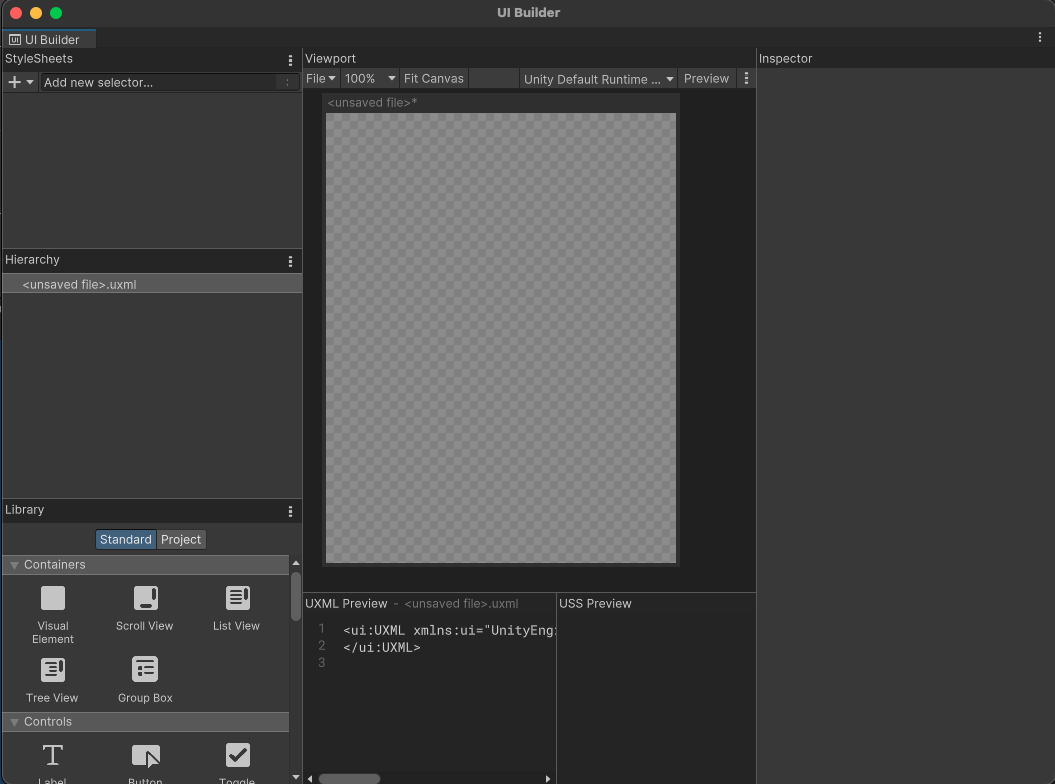
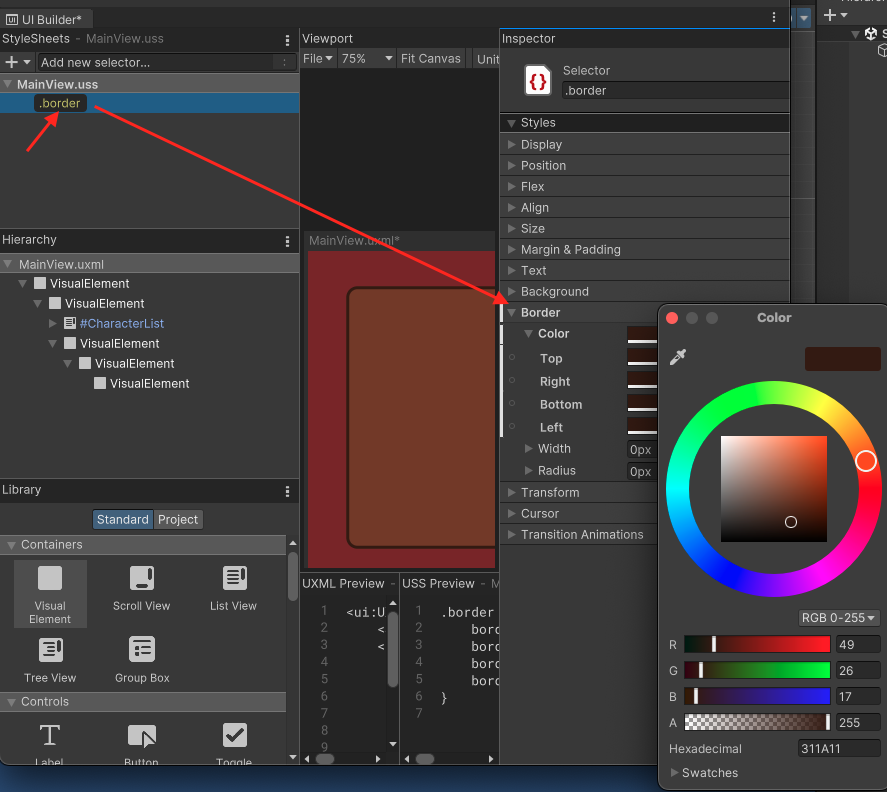
選擇 Window -> UI Toolkit -> UI Builder便可開啟UI Builder畫面

  • StyleSheets:讓你編輯目前UI Document(UXML)的StyleSheets(USS)
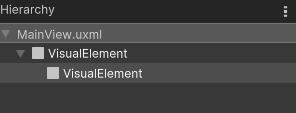
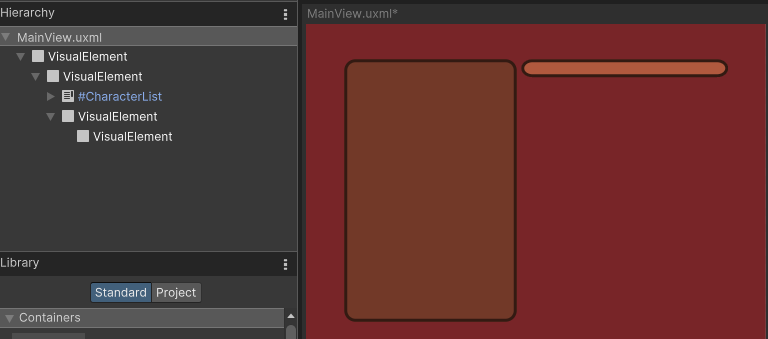
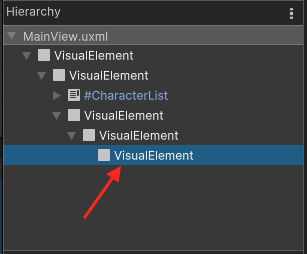
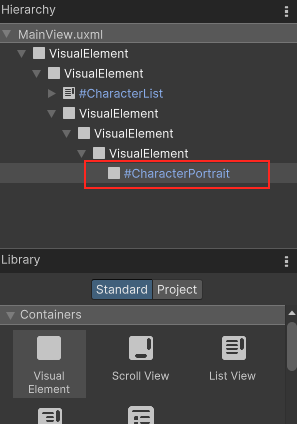
  • Hierarchy:顯示目前UI Document的element結構樹
    • 在這個Hierarchy中顯示的是element的name attribute,如果這個element沒有name則顯示它的C# type
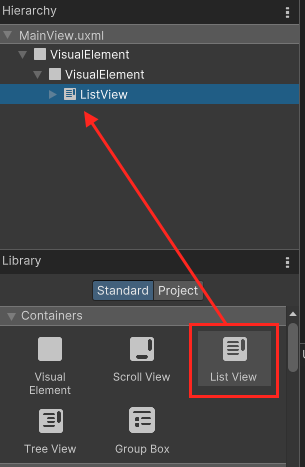
  • Library:顯示目前可以使用的elements,其中Standard為Unity內建的elements;Project則為專案中自訂的element (.uxml assets以及繼承VisualElement並有在UxmlFactory設定可以被UXML實體化的C# element )。
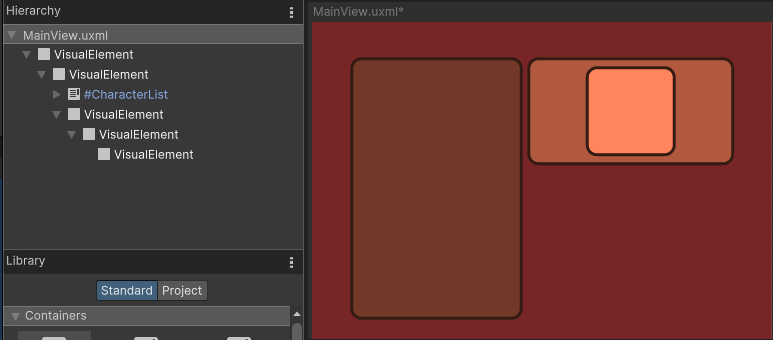
  • Viewport:會顯示UI Document (UXML) 的畫面,並會儲存目前UI Document (UXML)的平移(pan)和縮放(zoom)狀態
    • 使用滑鼠中鍵(Middle-click),或是使用Ctrl/Cmd + Alt/Option + 滑鼠左鍵可以拖動Viewport。
    • 使用滑鼠滾輪可以縮放Viewport。
  • UXML Preview與USS Preview:此處可以預覽UI Builder產生的UXML與USS
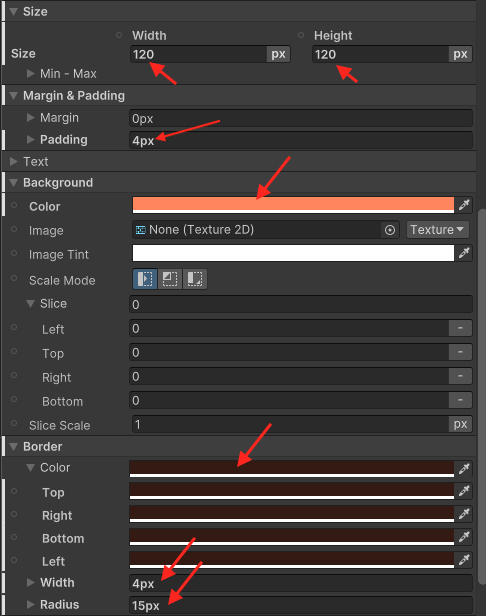
  • Inspector:與Unity原有的Inspector類似,根據選擇的element顯示對應的設定內容

下一篇:UI-Builder-2-(開始使用UI-Builder)

Visual Tree

UI Toolkit是用於開發使用者介面 (UI) 功能、資源和工具的集合,UI Toolkit啟發於 web technologies。它是一個retained-mode UI system,支援stylesheets,dynamic與contextual event handling

  • Visual element:在UI Toolkit中,組成UI的最基礎block為Visual element,在C#程式碼中,它繼承VisualElement,你可以設定它的風格(style),定義它的行為,讓它作為UI的一部份顯示在screen上面。
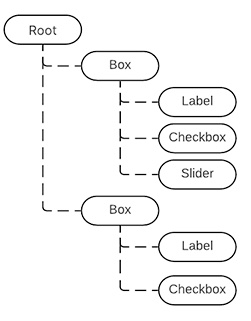
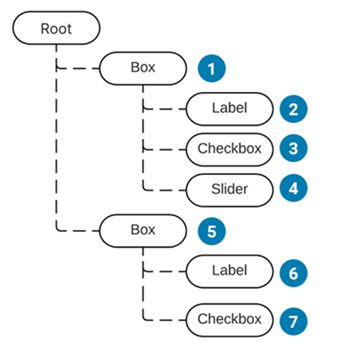
  • Visual Tree:由Visual element組成的有序且具父子關係(parent-child relationships)的樹狀結構(hierarchy tree)。

    一個簡單的 Visual Tree
    • 所有在Visual Tree中的node都繼承VisualElement,VisualElement的子類定義了各種UI的功能如ButtonText input fields等,稱為Controls,Unity提供很多內建的Controls
    • Panels:是一個visual tree的parent object,它擁有rootVisualElement,但是它不是visual element,panel也負責處理focus control與為visual tree分派事件(event dispatching)。
    • Draw order:visual tree是使用depth-first search,因此他的順序會是
      1. 最上面的visual element
      2. 這個visual element的第一個child element
      3. 這個child element的後代
    • 座標(Coordinate)與位置(Position)系統:在UI Toolkit中,它使用style properties中的layout parameters去計算每個element的座標與位置,基於Flexbox。
      • 相對(Relative)位置:相對於元素計算位置的座標,布局系統(layout system)計算元素的位置,然後將座標添加為偏移量。父元素可以影響子元素的大小和位置,因為布局引擎在計算元素位置時將它們考慮在內。子元素只能影響父元素的大小。
      • 絕對(Absolute)位置:相對於父元素的座標,這繞過自動布局計算,直接設置元素的位置。在相同父元素下的同級元素(Sibling elements)對該元素的位置沒有影響。同樣地,該元素不影響相同父元素下其他同級元素的位置和大小。

Reference: https://docs.unity3d.com/Packages/com.unity.ui.builder@1.0/manual/uib-interface-overview.html
https://docs.unity3d.com/Manual/UIElements.html
Physics Material實體材質

實體材質,決定你的物體摩擦力與彈性,讓你的物件可以滑動或是反彈

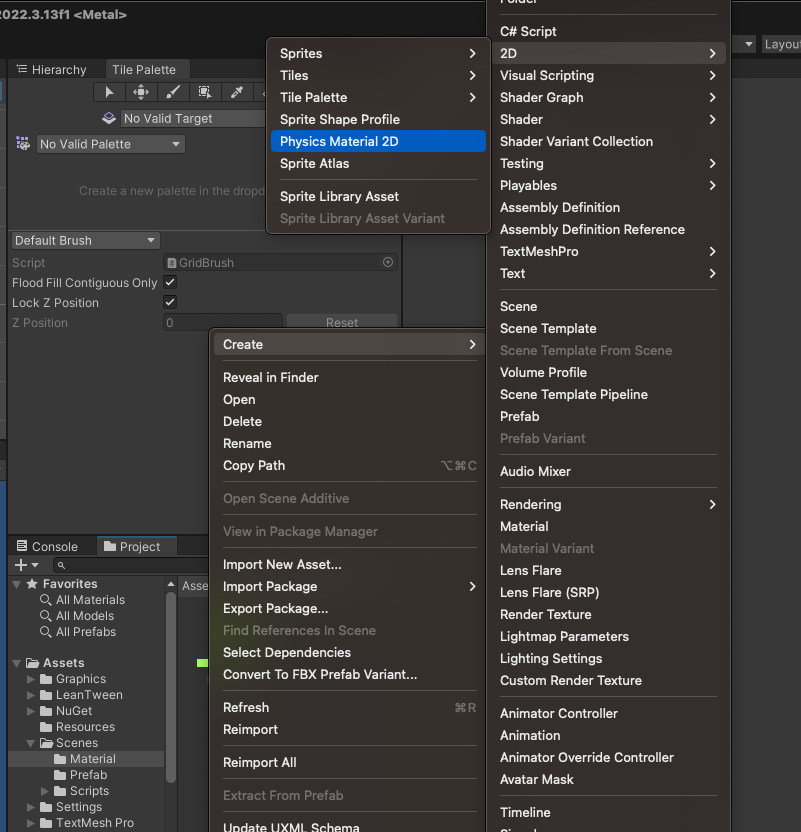
在專案的畫面中使用滑鼠右鍵,找到Create ->

  • 如果是2D,選擇 -> 2D -> Physics Material 2D
  • 如果是3D,選擇 -> Material

參數簡介

  • Dynamic Friction:已在移動時使用的摩擦力,通常為0到1之間的值
    • 值為0時,就像冰一樣,會滑動
    • 值為1時,將使物件迅速靜止,除非使用很大的力或重力推動該物件
  • Static Friction:當物件靜止在表面上時的摩擦力,通常為0到1之間
    • 值為0時,就像冰一樣,會滑動
    • 值為1時,將使物件很難推動
  • Bounciness:表面的彈性,
    • 值為0時,不會反彈
    • 值為1時,在反彈時不會產生任何能量損失,可以一直反彈
  • Friction Combine:兩個碰撞物件的摩擦力的組合方式
    • Average:對兩個摩擦值求平均值
    • Minimum:使用兩個值中最小的值
    • Maximum:使用兩個值中最大的值
    • Multiply:兩個摩擦值相乘
  • Bounce Combine:兩個碰撞物件的彈性組合方式,其模式與Friction Combine相同

碰撞器(Collider)

剛體(Rigidbody)賦予了物件可以接受力,而碰撞器(Collider)則賦予物件碰撞的形狀(edit collider),以及是否可以會其他物件碰撞,越複雜形狀的碰撞器越耗效能。

參數簡介

  • Is Trigger:是否是觸發器,如果啟用則該collider將用於觸發事件,並被物理引擎忽略,主要用於進行沒物理效果的碰撞檢測
  • Material:物理材質,可以確定碰撞體和其他物件碰撞時的交互方式
  • Center:碰撞體在物件局部中的中心點位置

Unity Rigidbody

Rigidbody(剛體)component:可將Rigidbody應用到你的遊戲物件(GameObject)上,讓這個GameObject可以被物理的方式控制,也將是說讓這個GameObject可以被physics forces(物理力,如推力,阻力等) 與 torque(扭力)作用。

另外在2D遊戲中,則是使用Rigidbody2D component它只會做用在2D環境,也就是說只能在XY plane上作用。

參數簡介

  • Body Type(Rigidbody2D)
    • Dynamic(動態,預設值)
      • 運動時受力影響,並且接受完全的物理模擬,包括重力、碰撞、施加力等,最耗效能。
    • Kinematic(運動學)
      • 不受力影響但可移動,其運動行爲是被我們開發者完全限定的,可以碰撞,沒有設定質量(Mass)的參數
      • 只會與Dynamic2D碰撞
    • Static(靜態)
      • 不受力影響也不會動,會與動態類型剛體碰撞,最不消耗效能。
  • Mass:質量,預設為千克,質量越大慣性越大,質量越大越不容易被別的物體推動
  • Drag:空氣阻力,根據移動物件時影響物件的空氣阻力大小,0表示沒有空氣阻力
  • Angular Drag:根據樞紐旋轉物件時影響物件的空氣阻力大小,0表示沒有空氣阻力
  • Use Gravity:是否受重力影響
  • Is Kinematic:如果啟用此選項,則物件不會被物理引擎驅動,只能透過Transform對其進行操作,
    • 對於移動平台,或者如果要動畫化附加了HingeJoint的剛體,此屬性非常有用
  • Interpolate:插值運算,讓剛體物體移動更平滑
    • None:不使用
    • Interpolate:根據前一幀的變換來平滑變換
    • Extrapolate:根據下一幀估計的變換來平滑變換
  • Collision Detection:碰撞檢測,用於防止快速移動的物體其他物體而不檢測碰撞
    • Discrete:預設值,離散檢測,
      • 最不耗效能的檢測,
      • 對場景中所有其他碰撞體使用離散碰撞檢測,
      • 用於一般碰撞。
      • 可能會出現當物體移動太快造成偵測不到與其他物體碰撞。
    • Continuous:連續檢測,
      • 對動態碰撞體(具有剛體),使用離散檢測
      • 對靜態碰撞體(沒有剛體),使用連續檢測
      • 對於所有其他剛體碰撞使用離散檢測
      • 較消耗物理效能
    • Continuous Dynamic:連續動態檢測
      • 對動態碰撞體(具有剛體)與靜態碰撞體(沒有剛體)都使用連續碰撞檢測
      • 對於所有其他剛體碰撞使用離散檢測
      • 用於快速移動的物體
    • Continuous Speculative:連續推測檢測
      • 對剛體和碰撞體使用推測性連續碰撞檢測,
      • 一般比Continuous Dynamic的成本低
  • Constraints:約束,對剛體運動的限制
    • Freeze Position:有選擇地停止剛體沿世界X, Y, 和 Z軸的移動
    • Freeze Rotation:有選擇地停止剛體圍繞局部X, Y, 和 Z軸的轉動

Collision Detection的效能消耗為Continuous Dynamic > Continuous Speculative > Continuous > Discrete

無剛體 Discrete Continuous Continuous Dynamic Continuous Speculative
無剛體 不檢測碰撞 Discrete Continuous Continuous Continuous Speculative
Discrete Discrete Discrete Discrete Discrete Continuous Speculative
Continuous Continuous Discrete Discrete Continuous Continuous Speculative
Continuous Dynamic Continuous Discrete Continuous Continuous Continuous Speculative
Continuous Speculative Continuous Speculative Continuous Speculative Continuous Speculative Continuous Speculative Continuous Speculative

將Animator包裝起來避免使用String輸入錯誤

在Unity中,使用Animator時,有時候會打錯字,造成找不到動畫,因此可以使用一個包裝類,將其包裝起來。

首先建立一個抽象類,AnimatorWrapper,在其中加入Animator依賴。

1
2
3
4
5
6
7
8
9
namespace Test
{
public abstract class AnimatorWrapper
{
protected Animator _animator;
public Animator Animator => _animator;
public AnimatorWrapper(Animator animator) => _animator = animator;
}
}

接著再需要播放動畫的物件實作對應的AnimatorWrapper類,將string參數放到這邊。

1
2
3
4
5
6
7
8
9
namespace Test
{
public class DoorAnimatorWrapper : AnimatorWrapper
{
public DoorAnimatorWrapper(Animator animator) : base(animator) { }
public void IsOpen(bool isOpen) => _animator.SetBool("Open", isOpen);
}
}

在使用時,透過AnimatorWrapper類曝露出來的IsOpen去操作animator。

1
2
3
4
5
6
7
8
9
private DoorAnimatorWrapper _animatorWrapper;
private void Awake()
{
var animator = GetComponent<Animator>();
_animatorWrapper = new DoorAnimatorWrapper(animator);
}

private void OpenDoor(bool isOpen)
=> _animatorWrapper.IsOpen(isOpen);

透過這種方式它能夠幫助減少因為打錯字符串而導致的錯誤,並提供了一個更加直觀、安全的介面來操作 Animator。

參考:Typos with string animation parameters

使用LiteDB

LiteDB是一個簡單且快速的NoSQL Database,它特色有

  • 輕巧,< 450kb並且完全由.NET C#受控程式碼(managed code)編寫
  • 可以使用NuGet套件管理器安裝
  • 跨平台
  • 單一存放檔案
  • 支援LINQ query

以下是簡易的使用方式

  1. 使用NuGet管理套件搜尋LiteDB並安裝
  2. 接下來便可以使用LiteDatabase建立或是開啟database
1
2
3
4
5
6
string dbPath = @"./MyData.db";

// Open database (or create if doesn't exist)
using (var db = new LiteDatabase(dbPath)){
...
}
  1. 建立一個POCO class
1
2
3
4
5
6
7
8
9
public class Customer
{
public int Id { get; set; }
public string Name { get; set; }
public int Age { get; set; }
public string[] Phones { get; set; }
public bool IsActive { get; set; }
}

  1. 使用 db.GetCollection<Customer>("customers") 去取得customer collection
  2. collection的Insert方法插入資料

以下是完整的例子(來自LiteDB)

1
2
3
4
5
6
7
8
9
10
11
12
13
14
15
16
17
18
19
20
21
22
23
24
25
26
27
28
29
30
31
32
string dbPath = @"./MyData.db";

// Open database (or create if doesn't exist)
using (var db = new LiteDatabase(dbPath))
{
// Get customer collection
var col = db.GetCollection<Customer>("customers");

// Create your new customer instance
var customer = new Customer
{
Name = "John Doe",
Phones = new string[] { "8000-0000", "9000-0000" },
Age = 39,
IsActive = true
};

// Create unique index in Name field
col.EnsureIndex(x => x.Name, true);

// Insert new customer document (Id will be auto-incremented)
col.Insert(customer);

// Update a document inside a collection
customer.Name = "123John Doe212";

col.Update(customer);

// Use LINQ to query documents (with no index)
var results = col.Find(x => x.Age > 20);
}

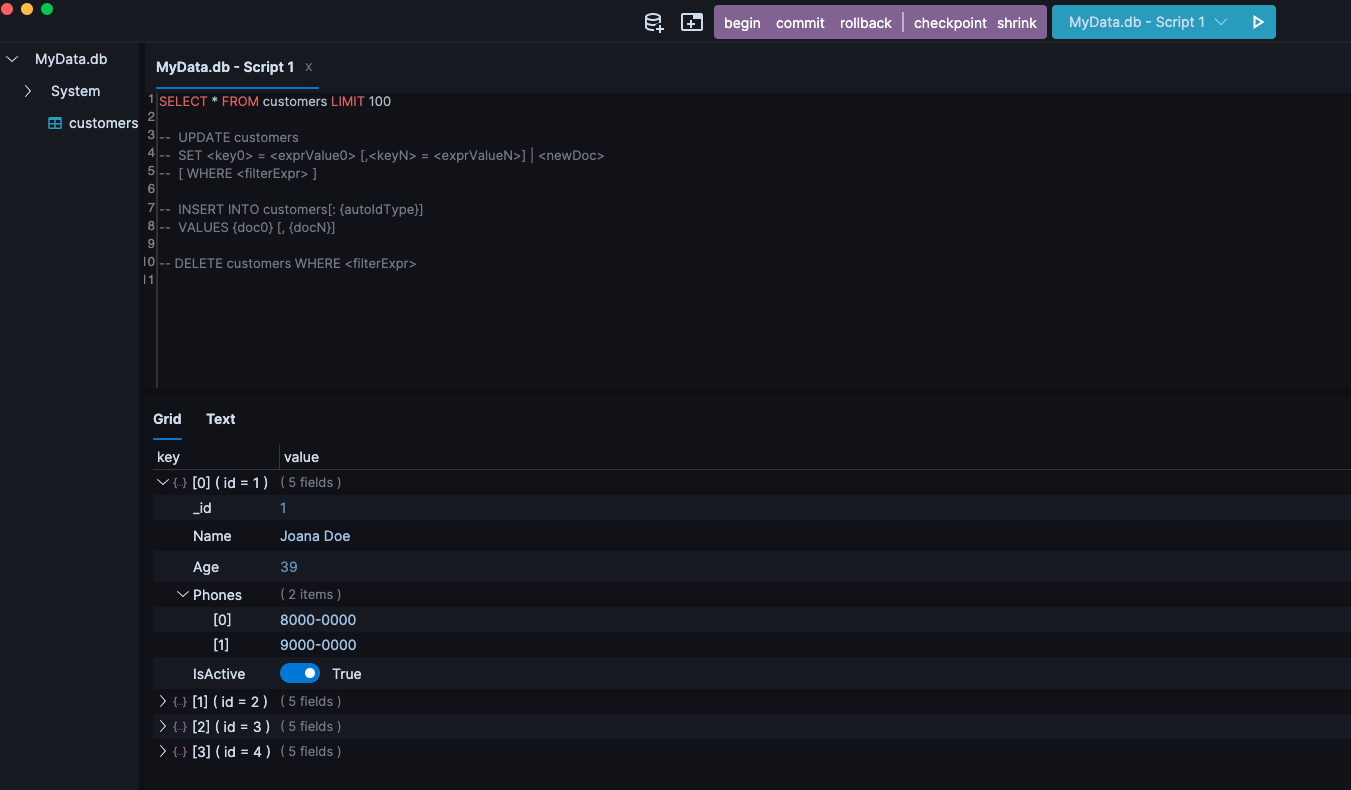
以下是方便你操作DB的GUI介面工具

  • OneBella:跨平台的GUI工具,支援修改和查詢,需要LiteDB 5+
    • 使用方式非常簡單,進入OneBella的 Release選擇下載對應平台的zip檔案即可
  • LiteDB.Studio
    • 一樣去Release下載最新版本即可,目前似乎只有Windows版本。

Unity使用NuGet

在Visual Studio下有方便的NuGet package manager 管理套件,所以可以很方便的安裝和管理NuGet套件,但是對Unity C# 專案來說,就不能直接使用NuGet package manager來管理套件。

幸好有第三方管理套件,NuGetForUnity 可以使用。

以下說明它的使用方式

  1. 進入Releas找到的它的unitypackage檔案下載(目前是NuGetForUnity.4.0.2.unitypackage
    這個版本)。
  2. 將下載好的unitypackage檔案拖入你的專案,按下import,便會開始匯入(import) NuGetForUnity到你的專案中。
    • 說明如何匯入NuGetForUnity
  3. 之後你就可以在上方選單找到NuGet了
    • 從選單打開NuGet

委派 Delegate

委派:delegate

  • 它的本質上是一個Class,主要用來定義method的類型
  • 可以把它想像為一個定義method容器,用來儲存要傳遞的method。
  • 使用委派讓你可以在呼叫method先處理一些邏輯,當這些邏輯處理完之後,在傳入這些method。

以下是他的語法

1
存取修飾詞 delegate 返回值 委派名(參數列表);
  • 如果沒寫存取修飾詞的話,預設為public的,
  • 若取修飾詞寫為private的話,則其他namespace不可以使用
  • 委派的method參數必須要對應

宣告範例

1
2
3
4
5
// 定義了一個無參無返回值容器 MyFun
delegate void MyFun();

// 定義了一個返回值為int,有一個int參數的委派容器
delegate int MyFun2(int a);

使用範例

1
2
3
4
5
6
7
8
9
10
11
12
13
14
15
16
17
18
19
20
21
22
23
24
25
26
27
28
29
30
31
32
33
delegate void MyFun();
delegate int MyFun2(int a);
class Program
{
static void Main()
{
Console.WriteLine("委派");

// 裝載method的容器
MyFun f = new MyFun(Fun);
// 呼叫容器裡面的method
f.Invoke();

// 簡化寫法,與f的方式一樣
MyFun f2 = Fun;
f2();

// 容器與委派的method參數必須要對應
MyFunc2 f3 = Fun2;
f3(1);
}

static void Fun()
{
Console.WriteLine("123456");
}

static int Fun2(int value)
{
Console.WriteLine(value);
return value;
}
}

C#預設先定義的委派

  • Action:是一個無參無返回值的委派
  • Func:一個無參數,但有一個返回泛型TResult的委派
  • Action(T obj)可以傳多個參數(最多有16個,是使用overload的方式),無返回的委派
  • Func<in T, out TResult>(T arg); 可以傳多個參數,且有一個返回泛型TResult的委派
  • 記憶方式:Func是有返回值的委託,而Action則是不會返回值的委託

Action例子

1
2
3
4
5
6
7
Action<int, string> action = FunTest;

static void FunTest(int a, string b)
{
// do something...
}

Func例子

1
2
3
4
5
6
7
Func<int, int> func = FunTest2;

static int FunTest2(int value)
{
Console.WriteLine(value);
return value;
}

Hexo添加Sitemap,讓Google能搜尋到自己的Hexo Blog

以下是操作步驟:

  1. 安裝Hexo sitemap套件
    1
    $ npm install hexo-generator-sitemap --save
  2. 為Hexo加入sitemap設定
    ˋ找到Hexo專案底下的 _config.yml
    1
    2
    sitemap:
    path: sitemap.xml
  3. 測試是否有建立sitemap檔案,在終端機輸入
    1
    $ hexo s
  4. 如果成功的話,可以在 /sitemap.xml 找到產生的sitemap
  1. 編譯並發布
  • hexo g -d
  1. 提交到Google Search Console
  • 進入 Google Search Console
  • 在網址前置字元那邊輸入Blog的網址,如圖:
  • 在左側找到Sitemap,點擊進入,輸入sitemap.xml,並提交,就完成了。如圖:
  1. 如果網站沒有驗證擁有權的話,會需要驗證,可以在Hexo啟用Google analytics,或是使用HTML檔案的方式驗證。
  2. 使用HTML檔案的方式驗證的話,要先下載HTML檔案,放到Hexo Blog目錄下,可以參考:Hexo 加入自訂的 HTML頁面